How to install a USA standard socket in a wooden wall?
Leave a message

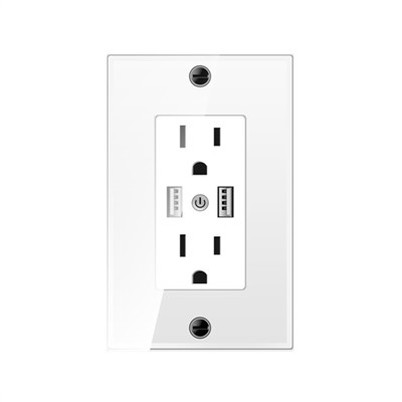
Installing a USA standard socket in a wooden wall can be a rewarding DIY project that enhances the functionality and safety of your living or working space. As a supplier of high - quality USA Standard Socket, I'm here to guide you through the process step by step.
Tools and Materials You'll Need
Before you start the installation, gather the necessary tools and materials. You will need a USA standard socket, a socket box, a screwdriver (both flat - head and Phillips - head), a drill with appropriate bits, a wire stripper, electrical tape, a voltage tester, and a pencil. Additionally, make sure you have the correct gauge of electrical wire that meets local electrical codes.
Safety First
Safety is of utmost importance when dealing with electrical installations. First, turn off the power supply to the area where you'll be working at the main electrical panel. Use a voltage tester to double - check that the power is off before you start handling any wires. Wear safety goggles and gloves to protect yourself from potential hazards such as flying wood chips or electrical shocks.
Step 1: Plan the Location
Decide where you want to install the USA standard socket. Consider the furniture layout, the intended use of the socket, and the proximity to other electrical devices. Mark the location on the wooden wall with a pencil. Make sure the area is free from any hidden pipes or wires. You can use a stud finder to locate the wall studs, which will provide a stable support for the socket box.
Step 2: Cut an Opening for the Socket Box
Using a drill, make a small pilot hole at the center of the marked area. Then, use a hole saw or a jigsaw to cut an opening in the wooden wall that is slightly larger than the socket box. Be careful not to cut too large, as this can cause the socket box to fit loosely. Remove the wood chips from the opening.
Step 3: Install the Socket Box
Insert the socket box into the opening in the wooden wall. Make sure it is flush with the surface of the wall. Use screws to secure the socket box to the wall studs. If there are no studs in the immediate area, you can use wall anchors to provide additional support.
Step 4: Run the Electrical Wires
Carefully run the electrical wires from the main electrical source to the socket box. Make sure to use the correct gauge of wire for the amperage of the circuit. You may need to drill holes in the wall or use wire channels to route the wires safely. Strip about 1/2 inch of insulation from the ends of the wires using a wire stripper.
Step 5: Connect the Wires to the Socket
Open the USA standard socket and identify the terminals. There are usually three terminals: a hot (black), a neutral (white), and a ground (green or bare copper). Connect the black wire to the hot terminal, the white wire to the neutral terminal, and the green or bare copper wire to the ground terminal. Use a screwdriver to tighten the terminal screws securely. Wrap each connection with electrical tape to prevent any exposed wires.
Step 6: Mount the Socket to the Box
Once the wires are connected, carefully place the socket into the socket box. Align the holes in the socket with the holes in the box. Use screws to attach the socket to the box. Make sure the socket is firmly attached and level.
Step 7: Test the Socket
After mounting the socket, turn the power supply back on at the main electrical panel. Use a voltage tester to check if the socket is receiving power. Plug in a small electrical device, such as a lamp, to confirm that the socket is working properly. If there are any issues, turn off the power immediately and double - check your connections.


Step 8: Finish the Installation
Once you have confirmed that the socket is working correctly, replace the socket cover. Make sure it fits snugly and is properly aligned. You can now start using your newly installed USA Standard Socket to charge your devices, power your appliances, and more.
Tips and Tricks
- If you're not confident in your electrical skills, it's always a good idea to consult a professional electrician.
- Keep all electrical tools and materials in a dry and safe place to prevent damage.
- Follow all local electrical codes and regulations to ensure a safe and compliant installation.
The Benefits of Our USA Standard Sockets
Our USA Standard Sockets are designed with the highest quality standards in mind. They are made from durable materials that can withstand daily use. Our sockets also feature advanced safety features, such as surge protection and child - proof covers. Additionally, we offer a wide range of Charging wall sockets that can charge your devices quickly and efficiently.
Contact Us for Procurement
If you're interested in purchasing our USA standard sockets for your home, office, or commercial project, we'd love to hear from you. Our team of experts can provide you with detailed product information, pricing, and technical support. Whether you need a single socket or a large quantity for a new construction project, we can meet your needs. Reach out to us to start a procurement discussion and find the best solution for your electrical requirements.
References
- National Electrical Code (NEC)
- Electrical Installation Guidebooks
- Manufacturer's Instructions for USA Standard Sockets